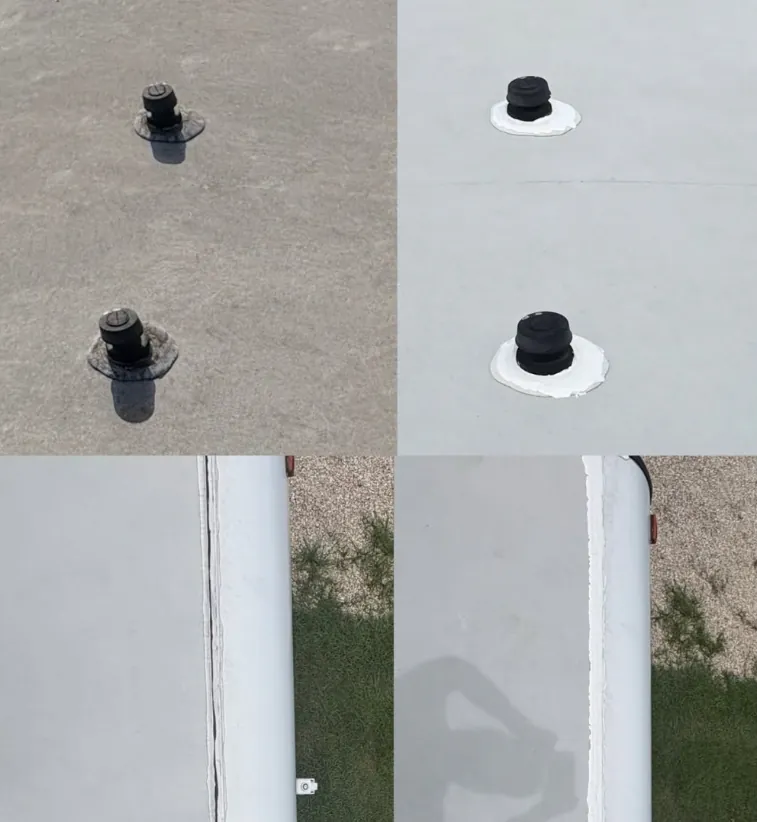
RV Roof Reseal and Lap Sealant Service - Mobile in Florida
Florida UV kills lap sealant in about two years. Mobile RV roof reseal, seam inspection and Dicor self-leveling work at your site. Call 888-759-1438.
A Florida roof reseal starts with a reading, not a caulk gun. Our technicians check the ceiling and overhead cabinets inside for staining, then walk the roof and press-test every seam: front and rear caps, the AC gasket, vent flanges, the skylight and the refrigerator vent. Sealant that has chalked, shrunk or lifted from a flange edge gets cut out and replaced, never covered over.
When Was the Last Time You Had a Roof Inspection?
The order matters, because the roof tells you where water is getting in and the interior tells you where it has already gone. Our technicians start inside with a pinless moisture meter across the ceiling panel, the tops of the overhead cabinets and the wall behind the front cap, since a reading that climbs as you approach a seam confirms an active path before anyone touches sealant. Then we get on the roof, ladder set at the rear and weight kept over the rafters, because not every laminated roof is rated to walk on. On the roof we press a thumb into each bead. Sound sealant still gives and springs back, while failed sealant is hard, chalky and crazed with fine cracks, or has pulled clean away from the metal flange edge. We check every screw head in every flange as well. Thermal cycling backs screws out slowly, and a proud screw head is the first thing that splits a bead from underneath.
Why Florida Eats Lap Sealant in Two Years, Not Five
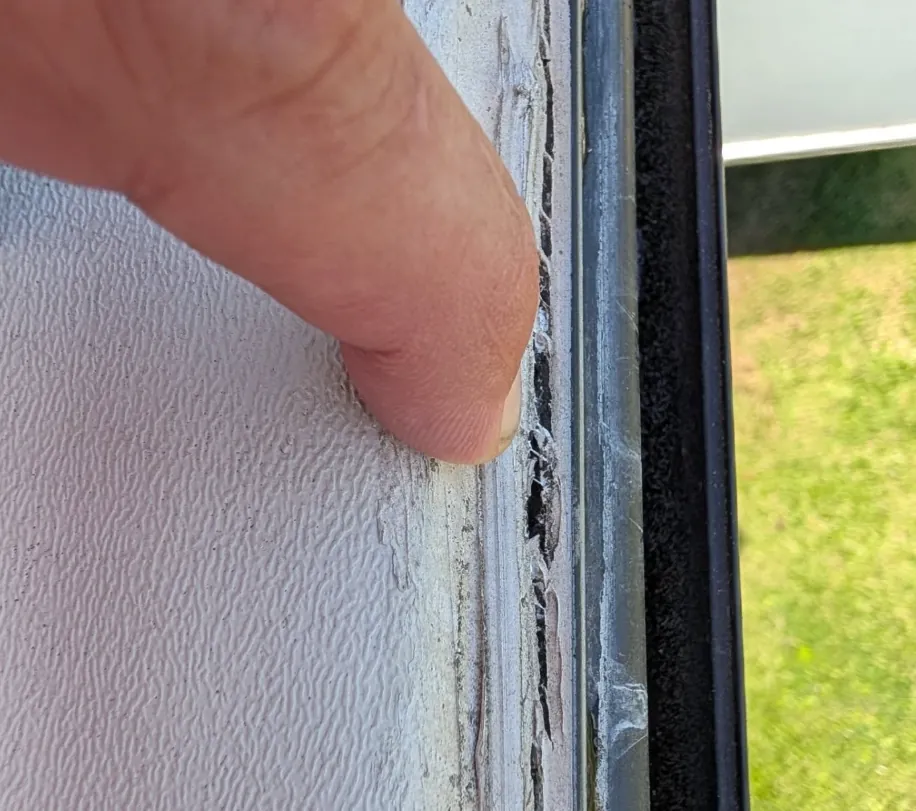
Self-leveling lap sealant fails by ultraviolet degradation rather than by wear. UV energy breaks the polymer chains and drives the plasticizer out of the compound, so the bead goes chalky on the surface, then shrinks, then loses the elasticity it needs to stretch across a joint that is still moving. At this latitude the UV index sits at 10 or 11 for a large part of the year instead of a short summer window, so the dose arrives roughly twice as fast as it does in the northern states the five-year figure comes from. Heat compounds it. A white EPDM membrane still reads over 150 degrees on an infrared thermometer on a July afternoon and drops fifty or more overnight, and the bead has to move with that cycle daily. There is no winter lay-up here either. The rig is not tarped and parked for five months, so the exposure never pauses and the clock never stops.
The Seams That Actually Fail, in the Order They Fail
Front and rear caps go first. Those joints carry the most movement on the whole roof, because the cap is a different material from the membrane and the two expand at different rates, and on a travel trailer the cap seam also takes the twist of the frame over every driveway apron. The rooftop air conditioner is next, though the failure there is usually the foam gasket under the shroud rather than the sealant around the flange. Vent flanges follow: the 14 by 14 inch openings for a Fan-Tastic or MaxxAir fan sit in the flattest part of the roof, where water stands after a storm instead of running off. After those come the skylight over the shower, the refrigerator roof vent, the antenna base, the ladder mounts and the solar bracket feet. Every one of them is a hole cut through the roof with a flange screwed over it, and every screw in that flange is a separate opportunity.
Self-Leveling, Non-Sag and Butyl Are Three Different Products
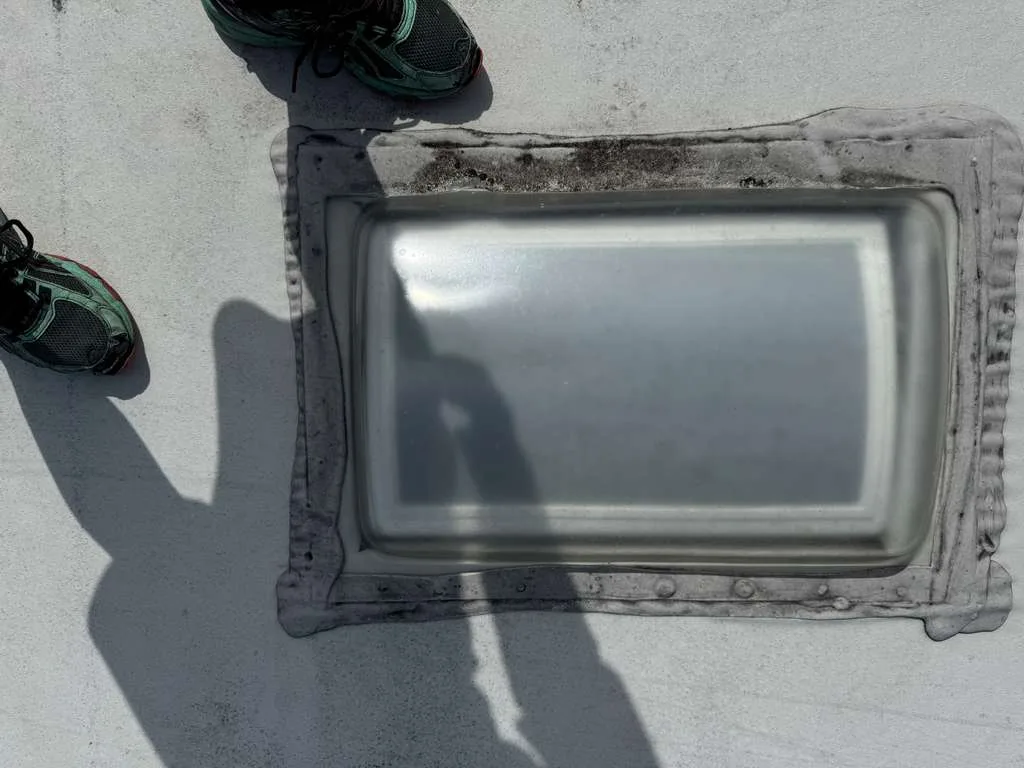
Dicor 501LSW self-leveling lap sealant is for horizontal surfaces only. It flows out and finds its own level across a flange edge, which is exactly what you want on a roof and exactly what you do not want on a vertical face, where it sags and leaves the top of the joint thin. Vertical and near-vertical surfaces take the non-sag version, Dicor 551LSW, which holds its shape on the side of a cap or an air conditioner shroud. What separates the two is geometry, not membrane. Dicor lists both formulas as compatible with EPDM, TPO and PVC, and states that both adhere to aluminum, wood, vinyl, galvanized metal and fiberglass, so the angle of the surface picks the product rather than what the roof is made of. Under the flange, butyl is doing the real work. A roll of 1/8 by 3/4 inch butyl seal tape compressed by the flange screws is the actual water seal, and the lap sealant on top is the secondary barrier keeping UV and standing water off it.
Why Sealing Over Failed Sealant Is the Mistake Most Owners Make
A fresh bead laid over an old one does not bond to the roof. It bonds to a chalked, oxidized surface that has already released from the flange, so the new sealant and the old layer lift together as one skin the following season. You have bought a year at most, and paid for materials twice. Worse, it hides the problem. Water that was tracking under the old bead keeps tracking, only now there is a watertight cap over the entry, so instead of showing at the seam it runs to the low point of the roof and appears as a ceiling stain three feet from where it actually got in. There is a third cost. Stacked sealant builds a dam that holds standing water on a flat roof, and it buries every screw head, so the next technician strips two layers instead of one. Removal is most of the labor in a reseal, and doubling it doubles the bill.
Do You Do Mobile Reseal Service?
Yes, and the whole job happens at your site: a driveway, a storage lot or a campground. Removal is the bulk of it: our technicians strip the failed bead with a plastic scraper and a heat gun, or an oscillating multi-tool with a flexible blade where it has gone rock hard, then wipe the substrate with denatured alcohol so the new sealant meets bare membrane. Materials tell you whether a quote is real. A 10.3 ounce tube of Dicor 501LSW covers roughly 25 to 30 linear feet at a quarter-inch bead, so a 34-foot trailer with a rooftop air conditioner, two 14 by 14 vents, a skylight and a refrigerator vent takes seven to nine tubes plus a roll of butyl tape. We do not quote a fixed price on an unseen roof.
When a Reseal Is No Longer the Right Job
A reseal maintains a roof that is still sound. It does not fix one that has already let water through, and treating it as though it does is how a maintenance visit turns into a structural repair a year later. The tells are specific. Decking that flexes or feels spongy underfoot near a vent, a moisture meter reading that stays high across a whole ceiling panel rather than spiking at one seam, a membrane crazed through to the scrim so the weave shows, or an interior panel starting to separate. Any of those means water is already in the structure, and the membrane or the decking has to come off. That is full membrane replacement, a different job with different pricing. The same goes for a fan that will not close, a crazed skylight dome or an air conditioner leaking past its gasket, which are component replacements rather than sealant work. Our technicians tell you which one you are looking at before anything starts.
Sources
Every figure on this page comes from a manufacturer document or a standards body, not from another repair site. Here is where each one comes from.
- Dicor Products - Self-Leveling Lap SealantDicor states its self-leveling lap sealant creates a secondary seal along roof edges, air vents, vent pipes and screw heads, that it is compatible with EPDM, TPO and PVC membrane, and that it is UV stabilized. That is the manufacturer confirming both the seams the product is meant for and that its enemy is ultraviolet exposure.
- Dicor Products - Non-Leveling Lap SealantDicor sells the non-sag formula as a separate product for roof edges and termination rails rather than open horizontal field, and lists its part numbers as the 551 series - 551LSB, 551LSD, 551LSG, 551LST, 551LSV and 551LSW, all in 10.3 oz tubes, with no 502 part number anywhere in the line. It also states the same membrane compatibility as the self-leveling product, EPDM, TPO and PVC with adhesion to aluminum, wood, vinyl, galvanized metal and fiberglass, which is the manufacturer basis for the page's rule that the two products split on surface geometry rather than on roof material.
- Dicor Products - Gunnable Butyl SealantDicor describes butyl as providing the watertight primary seal between lapping substrates and joints, while it describes lap sealant as a secondary seal. That is the manufacturer stating outright that the butyl under the flange does the real work and the bead on top is the secondary barrier.
Related repairs
Other systems we service
Where we work
Service category
What this usually costs
| Item | Price | What it covers |
|---|---|---|
| Service call | $299 | Includes the trip out to your RV and the first hour on site |
| Work past the first hour | Quoted after diagnosis | We tell you what it will take before we carry on |
| Parts | Quoted per job | Special-order parts may need a deposit before we order them |
| Written estimate | No charge | You approve the estimate before any work starts |
The service call covers the trip out to your RV and the first hour on site. Anything beyond that depends on what we find, and we quote it and get your approval before carrying on.
The price ranges on this page come from our own recent jobs across Florida, not from an industry average. What you pay depends on the rig, the parts it needs and what we find on site, so we give you a written estimate before any work begins and you approve it first.
Frequently asked questions
Do you do mobile reseal service?
Yes. A reseal is mobile work by nature, since what it takes is a ladder, a scraper, a heat gun and a caulk gun, so our technicians work at your driveway, storage lot or campground site anywhere in Florida. What we need from you is level ground, room for a ladder at the rear, and a dry window, because self-leveling sealant has to go onto a dry roof and wants a few hours without rain after.
Can you inspect the roof and tell me about an actual repair?
That is how every one of these starts. The inspection is a moisture meter pass inside, then a seam-by-seam press test on the roof, and it ends with a list of which seams are sound, which need stripping and resealing, and whether anything has already gone past sealant work into membrane or decking repair. You get that list before any materials are ordered or work begins.
Can you do a roof and seal assessment, and what does it cost?
Yes, and it is how most of these jobs start. Our service call covers the trip out to your RV and the first hour on site, and the current rate is in the pricing table on this page. Anything beyond that first hour depends on what the roof turns out to need, and we quote it and get your approval before we carry on. If you go ahead with the reseal on the same visit, that hour has already been spent up on the roof rather than added as a separate charge on top of the work.
Where is the rooftop air conditioner leaking?
Almost always through the foam gasket under the shroud rather than through the sealant around the flange. That gasket is compressed between the roof and the unit by four bolts, and the Dometic spec is roughly 40 to 50 inch-pounds, enough to squash the foam without cracking the shroud. Over-tightened bolts and UV-hardened foam produce the same drip at the ceiling plenum, and neither one is fixed with more caulk.
Do you repair or replace roof vents, and can you fix manual roof vents?
Both. A manual crank vent that binds, will not latch or has a cracked lid is usually a lid, a crank mechanism or a hinge pin rather than a whole unit, and those are repairs. If the 14 by 14 flange itself is cracked or the dome has gone sun-brittle right through, replacement is the honest answer, and the new flange gets butyl tape underneath and fresh lap sealant over the screw heads.
When was the last time you had a roof inspection?
It is the first question our technicians ask, because in Florida the honest interval is an inspection at least twice a year, once before hurricane season opens on June 1 and once after it closes, with a full reseal roughly every two years. Owners who moved down from a northern state are often working off a five-year habit, and that gap is where a large share of the leaks we find come from. If you cannot remember the last one, assume the caps and the AC gasket are due.