RV Rooftop AC Gasket Reseal - Stop Ceiling Leaks in Florida
Rooftop AC mounting gasket reseal across Florida. The unit is lifted, the compression set gasket replaced, bolts torqued to spec. Call 888-759-1438.
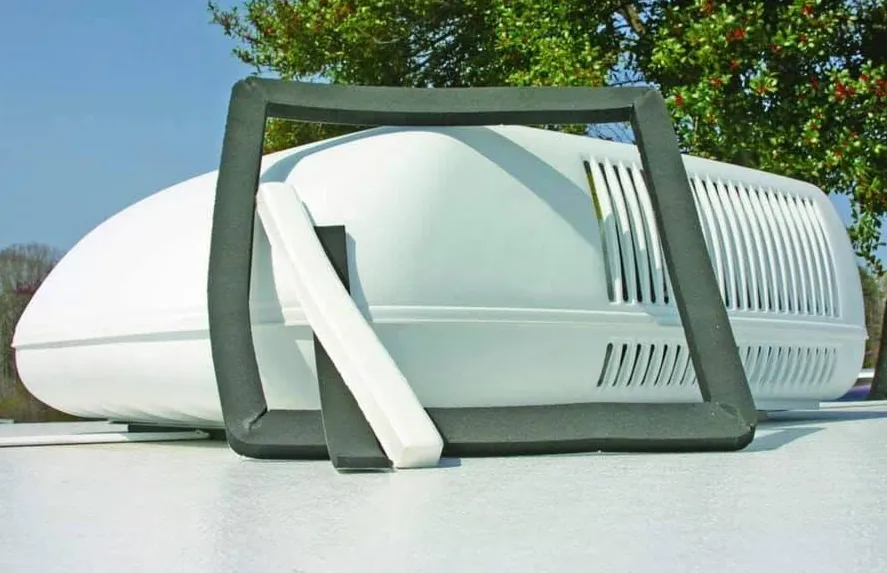
Water appearing on the ceiling around a rooftop air conditioner is almost never the air conditioner. The unit sits on a foam gasket squeezed over a roughly 14 inch roof opening by bolts running through the ceiling assembly, and that gasket is the only seal there is. Over years it takes a permanent compression set, stops springing back, and rain finds the gap. The repair means lifting the unit off and replacing the gasket.
Water Stains on the Ceiling Around the Air Conditioner
Owners describe this failure the same way: a stain creeping across the ceiling panel around the air conditioner, or drips off the return air grille during a hard rain. It shows up after years of nothing, which is exactly what makes it confusing, because nothing was touched and nothing changed. What changed is the gasket, and gaskets fail on a timeline instead of on an event. Timing and location tell you which failure you have. Water that appears only in wind driven rain, and only at the corners of the ceiling assembly or running down the inside of the shroud edge, is coming through the roof opening the unit sits over. Water that appears while the unit runs on a dry day is condensate from a blocked drain path, which is a different repair entirely. A rooftop unit that runs nine or ten months a year in Florida also puts far more vibration hours into that joint than the same rig would collect up north.
The Foam Gasket Is the Only Seal Over That Roof Opening
There is no second line of defense up there. The rooftop unit is set over a square hole cut through the roof and the interior ceiling, and a foam or neoprene gasket bonded to the underside of its base pan is compressed onto the roof surface by bolts that pass up through the ceiling assembly into threaded inserts in the pan. Nothing else spans that opening. The opening itself is tighter than most owners expect. Dometic Brisk II Evolution instructions call for an opening no smaller than 14-1/8 inches and no larger than 14-3/8 inches square, while Coleman-Mach 45000 Series instructions accept anywhere from 14 to 15 inches on a side. On a 15 inch cut the gasket has less roof left to bear on, so the number matters. Closed cell foam under constant load takes a compression set. It stops rebounding, the bolts lose tension, and a joint that sealed for a decade starts admitting water at the corners first.
Why Caulking Around the Outside of the Unit Never Works
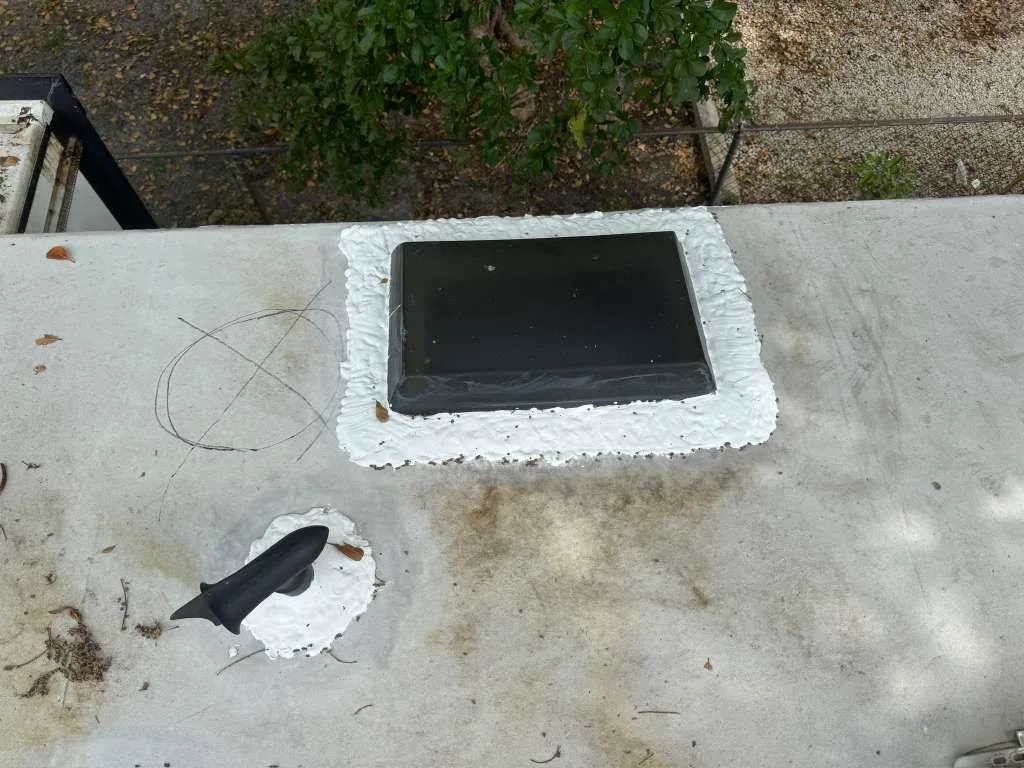
This is the fix almost every owner tries first, and it is the one that costs the most time. Water is entering between the gasket and the roof, inboard of any bead that can be laid from outside, so a ring of sealant around the base pan or the shroud is sealing a surface the water never crosses. Worse, it makes the diagnosis harder. A sealed perimeter traps whatever gets past it, holds standing water against the roof membrane and against the bottom edge of the base pan, and hides the drip path that would otherwise show a technician where the joint has opened. Removing that hardened bead later becomes its own hour of scraping. Dometic's own installation sequence points the same direction: screw holes and seams inside the gasket footprint get sealed with all weather sealant before the unit is set down, never after. The sealing happens underneath the unit, where the joint actually is.
Bolt Torque: 40 to 50 Inch Pounds, and Why Tighter Is Worse
Dometic publishes a number. Brisk II Evolution and Penguin II instructions both call for tightening the mounting bolts evenly to 40 to 50 inch pounds, which compresses the roof gasket to roughly half an inch, and the bolts are self locking so further tightening buys nothing. Coleman-Mach publishes no torque figure at all. Airxcel sets tension visually instead: proper tension is reached when any portion of each gasket indicating tab has been pulled down even with the roof, and that point is defined as optimum gasket compression. Overtightening is the classic do it yourself mistake, because a leak feels like a tightness problem. Dometic warns that over torque damages the unit base pan or the ceiling template, while too little torque leaves an inadequate roof seal. Crushed foam cannot rebound, so an over torqued gasket is a gasket with its service life already spent, and a sun aged shroud splits rather than flexes when the assembly is drawn down hard and unevenly.
What Gets Checked, in Order, and What Each Finding Costs
Diagnosis starts inside the coach, not on the roof. A moisture meter across the ceiling panel, the overhead cabinet returns and the wall above the dinette maps how far the water has traveled, and that map decides whether this is a gasket job or a ceiling panel job. On the roof, the shroud comes off first. Bolt tension is checked at each mounting position, then the gasket line is inspected for a hardened squeeze out edge, chalky foam, or a corner where the base pan no longer sits down on the roof at all. Left alone, a gasket leak stops being a gasket job. Water tracks along the ceiling framing into the panel, then down into the wall, and ceiling panel replacement, delamination repair and subfloor work all cost multiples of a reseal. A reseal is measured in hours; everything downstream of skipping it is measured in days.
Lifting the Unit, Gasket Thickness and a Sun Baked Shroud
The unit has to come off. A Penguin II weighs approximately 100 pounds by Dometic's own figure, with a mechanical hoist called for to place it, and Dometic explicitly warns against sliding the unit because sliding damages the neoprene gasket and creates a leaky installation. That one instruction rules out every shortcut in which the unit gets nudged and resealed in place. Gasket thickness is the variable on an older roof that has crowned or dished. Where a standard gasket cannot take up the gap, Airxcel offers a Roughneck gasket and bolt package, part number 48207-3301, for high lateral load installations, plus a spring pad kit, part number 8333-3871, for low friction roofs in aluminum, steel or gelcoat fiberglass, both intended to hold bolt tension. The shroud gets inspected while the unit is down. Years of Florida ultraviolet exposure leave that plastic chalky and brittle at the mounting bosses, and brittle plastic is a poor candidate for a torque wrench.
Sources
Every figure on this page comes from a manufacturer document or a standards body, not from another repair site. Here is where each one comes from.
- Dometic Brisk II Evolution 15K installation instructionsFour mounting bolts tightened evenly within 40 to 50 inch pounds, the warning that overtightening damages the base pan or ceiling template while insufficient torque leaves an inadequate roof seal and can cause a leak, the 14-1/8 to 14-3/8 inch roof opening limits, and the instruction to seal screw holes and seams where the roof gasket will sit before the unit is set down.
- Dometic Penguin II installation instructionsBolts torqued to 40 to 50 inch pounds compress the roof gasket to approximately one half inch and are self locking, the unit weighs approximately 100 pounds and calls for a mechanical hoist, and the warning not to slide the unit because it damages the neoprene gasket and creates a leaky installation.
- Coleman-Mach 45000 Series air conditioner installation instructionsA roof opening of 14 to 15 inches on a side, four bolts supplied with the ceiling assembly, proper bolt tension defined visually by each gasket indicating tab being pulled down even with the roof rather than by any torque figure, and the Roughneck gasket and bolt package part number 48207-3301 plus the spring pad kit part number 8333-3871 for low friction roofs.
Related repairs
- our Epdm Rubber Roof Replacement service
- Tpo Roof Replacement in Florida
- how we handle fiberglass roof repair
Other systems we service
Where we work
Service category
What this usually costs
| Item | Price | What it covers |
|---|---|---|
| Service call | $299 | Includes the trip out to your RV and the first hour on site |
| Work past the first hour | Quoted after diagnosis | We tell you what it will take before we carry on |
| Parts | Quoted per job | Special-order parts may need a deposit before we order them |
| Written estimate | No charge | You approve the estimate before any work starts |
The service call covers the trip out to your RV and the first hour on site. Anything beyond that depends on what we find, and we quote it and get your approval before carrying on.
The price ranges on this page come from our own recent jobs across Florida, not from an industry average. What you pay depends on the rig, the parts it needs and what we find on site, so we give you a written estimate before any work begins and you approve it first.
Frequently asked questions
Where is the rooftop air conditioner leaking?
In most cases it is not leaking from the air conditioner at all. Water is passing between the compressed foam gasket and the roof surface, then running down the inside of the roof opening onto the ceiling assembly. That is why the stain appears around the grille rather than under it. Sealant, condensate drains and the shroud all get ruled out before the gasket is called, because each of those produces a different drip pattern.
Why does the model of the rooftop AC matter before a quote?
Because the two dominant brands specify gasket compression in incompatible ways. A Dometic gets its bolts torqued to 40 to 50 inch pounds, while a Coleman-Mach has no published torque figure and is set by pulling each gasket indicating tab down level with the roof. Bolt count and roof opening tolerances differ too, so the model determines which gasket, which hardware and which method the job actually needs.
Do you do mobile reseal service?
Yes. An AC gasket reseal is done where the rig sits, provided there is safe roof access and a dry weather window long enough to open the roof and close it again. The unit is lifted, the old gasket removed and a new one set, so the roof cannot be left open partway through. A wet forecast moves the appointment rather than shortening the job.
How long does an RV AC gasket reseal take?
A typical single unit reseal on a rig with no hidden damage runs about two to three hours. That covers pulling the shroud, disconnecting the wiring, dropping the ceiling assembly, lifting the unit clear, scraping the old gasket, setting the new one, bolting down to spec and testing operation. A second rooftop unit adds most of that time again, and a soft ceiling panel found underneath changes the job entirely.
Can the original gasket be reused once the unit is off?
No. A gasket that has been under load for years has already taken a compression set, and lifting the unit breaks whatever residual seal was left. Dometic warns that merely sliding a unit on its gasket creates a leaky installation, so a gasket fully unloaded and then set back down will not seal reliably. The gasket is the least expensive part in the whole job and the only one that has to be right.
Will resealing the AC fix a ceiling stain that is already there?
It stops the source, but it does not undo the damage. A stain means water has already reached the ceiling panel, and that panel needs a moisture meter reading before anyone commits to a plan. Dry framing with light staining is often cosmetic, while a soft or delaminated panel means the repair extends past the gasket into panel replacement and, in the worst cases, into the wall structure below.