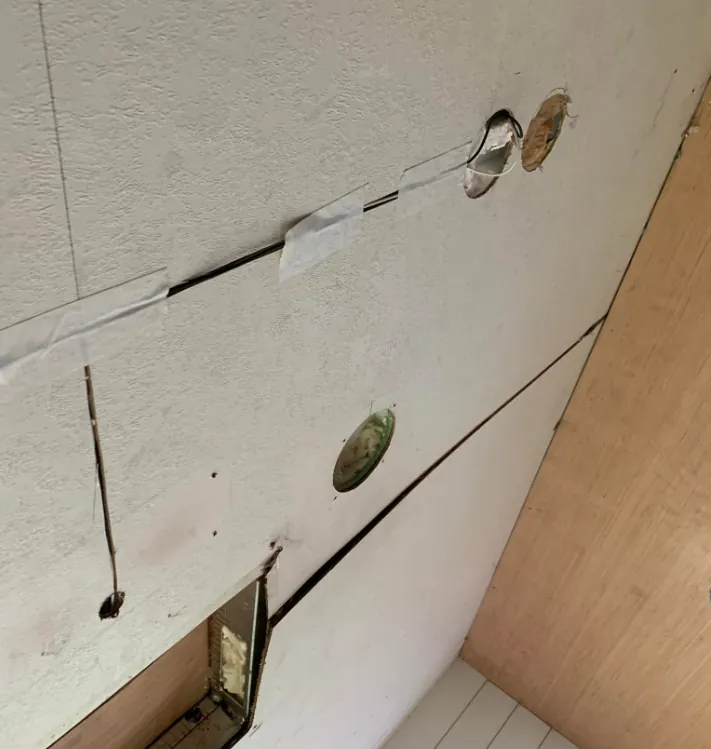
RV Ceiling Panel Replacement After a Roof Leak in Florida
Stained or sagging RV ceiling panel? We trace the leak, seal the roof first, then replace the panel. Mobile service across Florida - 888-759-1438.
A stained RV ceiling panel that gets ignored becomes a wet truss bay, then saturated insulation, then rotted roof decking that will not hold a screw. RV ceiling panel replacement is the last step in that repair, not the first. The stain marks where the water dropped, not where it entered, so the roof penetration is found and sealed first and the panel goes back only after the cavity is dry.
Why the ceiling stain is almost never under the leak
A ceiling stain is the exit point of a leak, not its entry. Water that gets past a roof penetration lands on the underside of the roof decking, and the first thing it meets is the truss system that Keystone describes as sitting between the interior paneling and the decking. Those members run across the coach and box the cavity into bays, so the water does not fall straight down. It travels along the top of a truss or along the top plate of the sidewall until it finds a staple hole, a wiring pass-through or a low spot in the panel, and that is where it finally drops. The result is a brown ring several feet from the actual failure, often on the far side of the vent or the rooftop air conditioner that let it in. Chasing the stain instead of the bay is how an owner ends up resealing the wrong penetration twice.
What an RV ceiling panel is actually made of
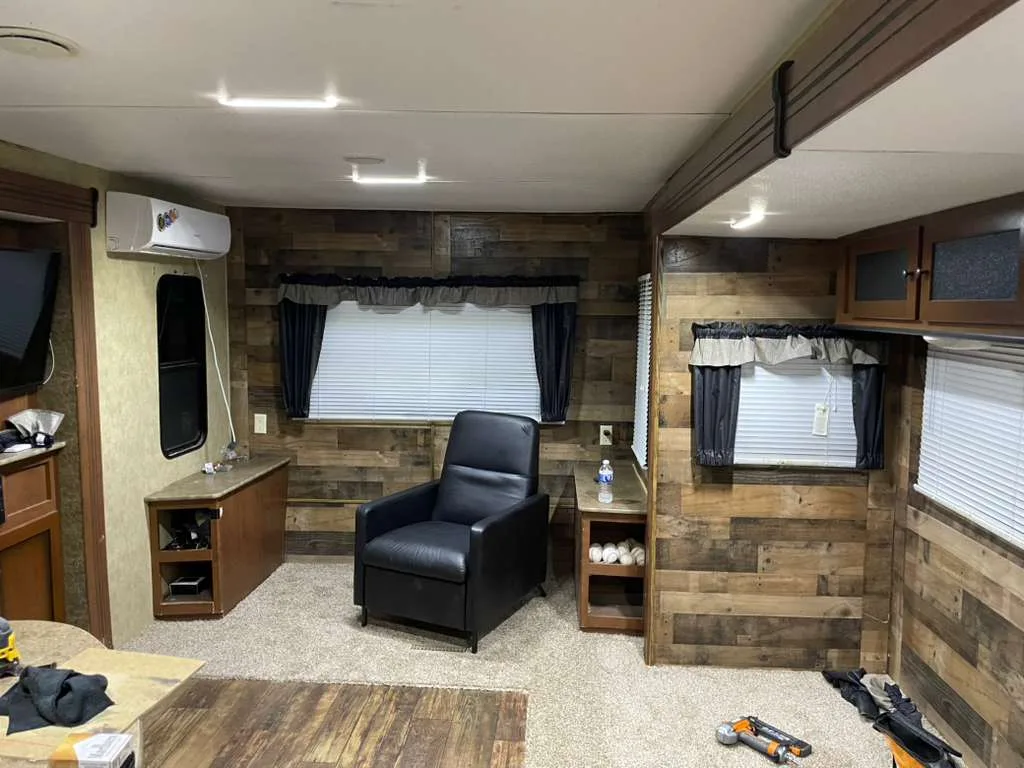
An RV ceiling panel is a thin structural skin with a decorative face, not a sheet of drywall. Under the printed vinyl film sits a substrate only a few millimeters thick, lauan plywood on older coaches and an Azdel Onboard RVX composite on newer ones, which Azdel lists as its standard laminating substrate for RV ceilings, roofs and sidewalls and as the replacement for lauan in that role. That laminate is bonded and stapled up to the trusses, so the panel is part of the roof assembly rather than something hung beneath it. Two consequences follow. The vinyl print is a production run that gets discontinued, so an exact color and grain match on a coach more than a few years old is rarely available. And because the panel is bonded rather than laid in, it cannot be lifted out, dried and dropped back the way a suspended ceiling tile can.
How the leak gets traced back from the stain
Diagnosis runs inside out, then back again. The first pass is visual: the shape of the stain, whether its edges are sharp or feathered, and whether the panel still sits flat against the trusses. The second pass is a pinless moisture meter: an Extech MO257 senses 20 to 40 mm behind the surface and reports on a 0.0 to 100.0 relative moisture scale with RISK and WET alarm points. On a panel only a few millimeters thick, that sensing field is reading the truss bay behind the panel rather than the panel itself, which is exactly what is wanted. The wet zone gets walked out until the readings fall away, and the boundary is marked. The third pass moves onto the roof, over whatever penetrations sit at the upstream end of that bay. The service call covers the trip out and the first hour on site, and anything beyond that is quoted after diagnosis and approved before work continues.
Stained but sound, or debonded and sagging
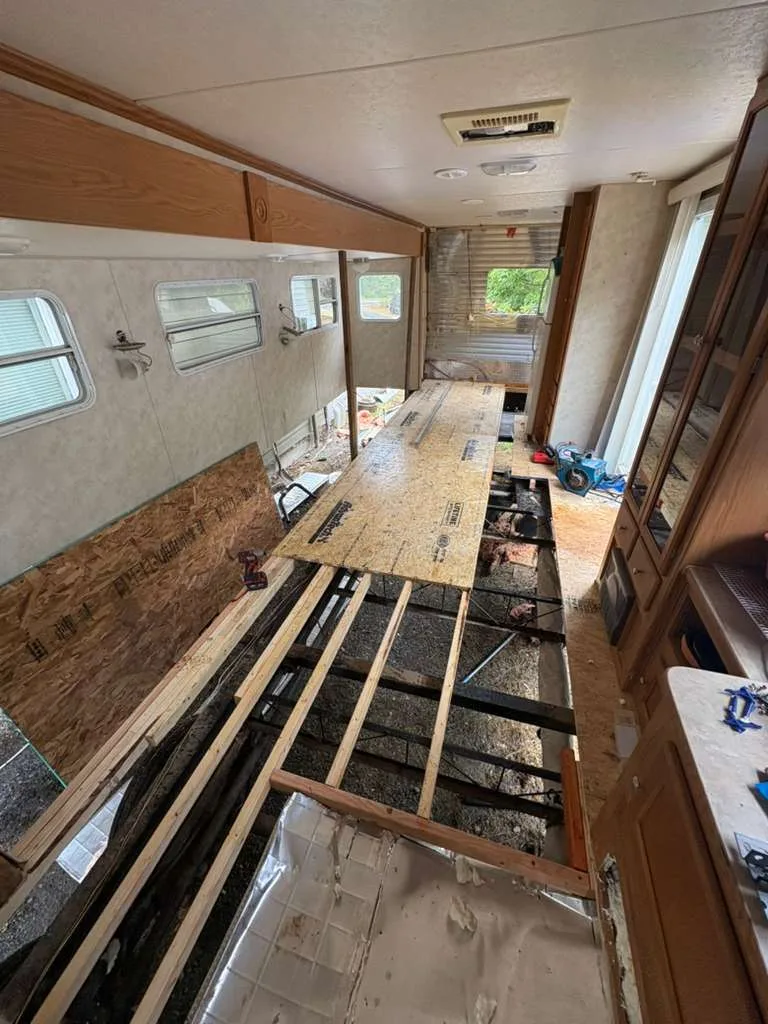
Two different repairs hide behind one symptom. A cosmetic stain means the panel took on water, dried and kept its bond: the vinyl is discolored but the substrate is still flat, still stapled and still firm under a flat palm. A debonded panel has lost the glue line. It feels spongy, it bows away from the trusses between fasteners, and the sag usually shows first as a shadow line running parallel to a truss rather than as a circle. The test is pressure, not appearance. If the panel moves and then stays down, or a fingertip leaves a dent in the vinyl face, the lauan behind it has come apart and no amount of cleaning or overpainting brings it back. Cosmetic staining can sometimes be covered or lived with. A debonded panel is a replacement, because the staple holes no longer hold anything.
Roof first, ceiling last: the sequencing rule
The order of operations is fixed: roof, cavity, ceiling. The penetration gets opened, resealed or rebuilt first, because Keystone's own guidance is that roof sealants deteriorate and that the deterioration is accelerated by heavy sun exposure. At Florida latitude that clock runs fast, and a fresh panel installed under an unsealed roof is a panel that gets stained again by the next afternoon storm. The cavity is second: insulation in the affected bay comes out, the underside of the decking is checked, and the bay is dried until its meter readings match a dry bay elsewhere in the same coach. Only then does the ceiling go back.
Owners who reverse that order pay for the ceiling twice. A panel fitted over decking that is still reading wet looks finished for one season and then telegraphs the same stain through the new material, usually in a slightly different place, which makes the second diagnosis harder than the first would have been.
The seam is the honest conversation
Ceiling panels arrive as full sheets, so the practical question is where the new sheet ends. Cutting a rectangle around the stain and gluing in a patch leaves a visible butt joint, and there is no filler-and-sand step available because the surface is a printed film rather than paint. That leaves three honest options. Replace out to the nearest natural break, meaning a truss line, a vent trim ring, a light fixture or the ceiling shroud of the air conditioner, so the seam lands where the eye already expects a line. Cover the joint deliberately with a batten strip or trim molding that reads as a design feature. Or replace the full run across the coach and accept the labor. Anyone promising an invisible patch on a printed vinyl ceiling is promising something the material does not do.
What a stained ceiling becomes if it is left
Left alone, this stops being a ceiling problem. Water held in the truss bay keeps the insulation compressed and wet, and a sealed bay under a Florida roof sits at attic temperature for months, which is a growth condition rather than a drying one. The decking above softens next, and softened plywood or OSB stops holding the screws that anchor the roof vent, the air conditioner and the sealant flanges themselves, so the original leak widens instead of staying still. The cheap version of this job is one resealed penetration and one panel. The expensive version is decking, insulation, framing and ceiling together, on a coach that has been quietly gaining weight in retained water the whole time. Inspecting roof seams, joints and attachments every 90 days is the published interval, and it is the difference between the two.
Sources
Every figure on this page comes from a manufacturer document or a standards body, not from another repair site. Here is where each one comes from.
- Keystone RV - RV Roof Assembly: Maintenance Tips and Common ConcernsThat the roof assembly is interior paneling, a truss system, insulation, roof decking (plywood or OSB) and roofing material glued to the decking; that roof sealants deteriorate and that deterioration is accelerated by heavy sun exposure; and the 90 day inspection interval for roof seams, joints and attachments.
- Hanwha Azdel - Azdel Onboard composite variationsThat the RVX composite is the standard laminating substrate for RV ceilings, roofs and sidewalls, that it is the replacement for lauan in that role, and that it is stocked in 2.7, 3.6, 4.7 and 5.2 millimeter thicknesses.
- Extech MO257 pinless moisture meter - manufacturer specificationThe pinless sensing depth of 20 to 40 mm (0.79 to 1.57 in), the 0.0 to 100.0 relative moisture scale with RISK and WET alarm points, and the manufacturer statement that the meter is for analyzing water leakage behind walls and in ceilings.
- DAP Weldwood Landau Top and Trim High Heat Resistant Contact CementThat vinyl-faced interior panels are bonded with a high heat resistant, water resistant contact cement formulated for headliner and vinyl bonding, which is why a bonded ceiling panel cannot be lifted, dried and re-laid.
Related repairs
Other systems we service
Where we work
Service category
What this usually costs
| Item | Price | What it covers |
|---|---|---|
| Service call | $299 | Includes the trip out to your RV and the first hour on site |
| Work past the first hour | Quoted after diagnosis | We tell you what it will take before we carry on |
| Parts | Quoted per job | Special-order parts may need a deposit before we order them |
| Written estimate | No charge | You approve the estimate before any work starts |
The service call covers the trip out to your RV and the first hour on site. Anything beyond that depends on what we find, and we quote it and get your approval before carrying on.
The price ranges on this page come from our own recent jobs across Florida, not from an industry average. What you pay depends on the rig, the parts it needs and what we find on site, so we give you a written estimate before any work begins and you approve it first.
Frequently asked questions
Why is the stain on my RV ceiling nowhere near the leak?
Because the ceiling panel is the bottom layer of a roof assembly, not a free-standing surface. Water entering at a vent or air conditioner lands on the decking and then runs along a truss or the top plate until it reaches a staple hole or a low spot. It drops there. The stain marks the exit, and the entry point is usually upstream in the same truss bay.
Can a stained ceiling panel just be cleaned or painted instead of replaced?
Sometimes, if the bond is intact. Press the area flat-palmed: if the substrate is firm and still stapled tight to the trusses, the damage is cosmetic and the panel can be cleaned or covered. If it feels spongy, dents under a fingertip, or bows away from the trusses between fasteners, the lauan has delaminated and the panel has to come out. Cleaning a debonded panel only delays the sag.
How do you tell how far the water actually spread?
With a pinless moisture meter, walked in a grid rather than spot-checked. An Extech MO257 senses 20 to 40 mm behind the surface on a 0.0 to 100.0 relative moisture scale, so on a thin ceiling panel it is effectively reading the truss bay above it. The wet boundary is walked out until readings drop back to what a dry bay in the same coach reads, and that outline is what gets opened.
Will a new ceiling panel match the rest of my RV?
Rarely an exact match on an older coach. The face is a printed vinyl film from a specific production run, and those patterns get discontinued, so the replacement sheet is usually close rather than identical. That is why seam placement matters more than the color hunt: taking the new panel out to a truss line, a trim ring or an air conditioner shroud puts the transition where a break already belongs.
What does RV ceiling panel replacement cost?
Our service call covers the trip out and the first hour on site at the rate in the pricing table on this page; anything past that first hour is quoted and approved before we carry on. It is quoted after the leak is traced, never before. The spread comes from what sits above the panel: a dry bay and a resealed vent is a short job, while wet insulation and soft decking is a different scope entirely.
Can you replace the ceiling before the roof gets fixed?
No, and no reputable shop should agree to it. Roof sealants degrade under sun exposure, and the manufacturers publish a 90 day inspection interval for seams and attachments for that reason. A panel installed beneath a penetration that still leaks is money spent on a surface that will stain again with the next storm. The roof is sealed, the bay is dried to meter, and the ceiling goes in last.