Norcold Cooling Unit Replacement: Mobile RV Service Florida
Norcold cooling unit failed? We diagnose the sealed system on site and replace it anywhere in Florida. Mobile RV refrigerator service - call 888-759-1438.
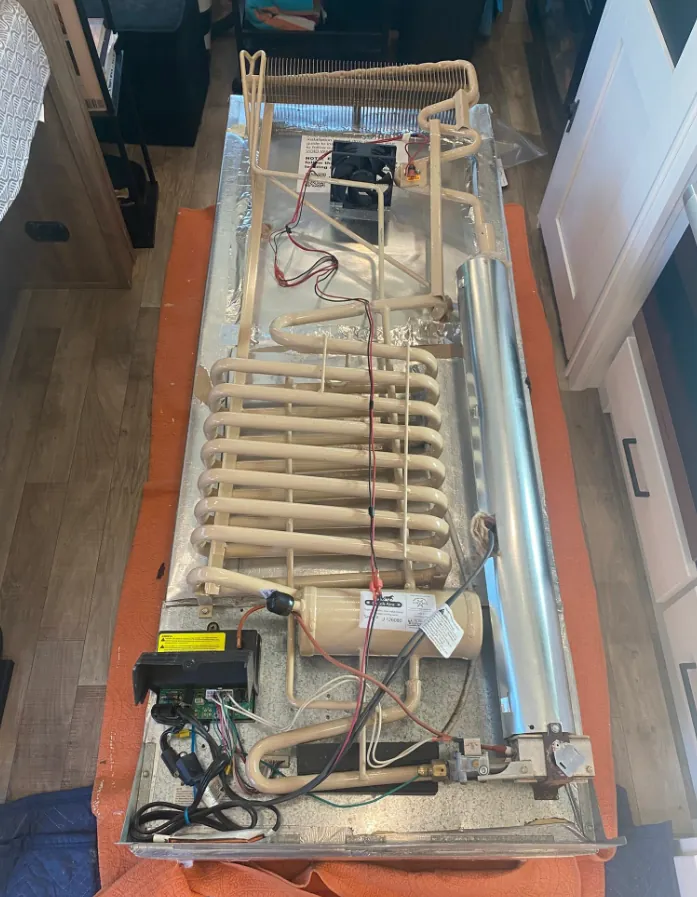
A Norcold cooling unit is the sealed steel assembly bolted to the back of the refrigerator that makes cold from heat, using ammonia, water and hydrogen instead of a compressor. When it fails, the boiler still gets hot but the box never gets cold, and a leaking sealed system cannot be repaired in the field, only replaced. Apex RV Repair diagnoses and replaces Norcold cooling units on site anywhere in Florida.
How We Diagnose a Failed Norcold Cooling Unit
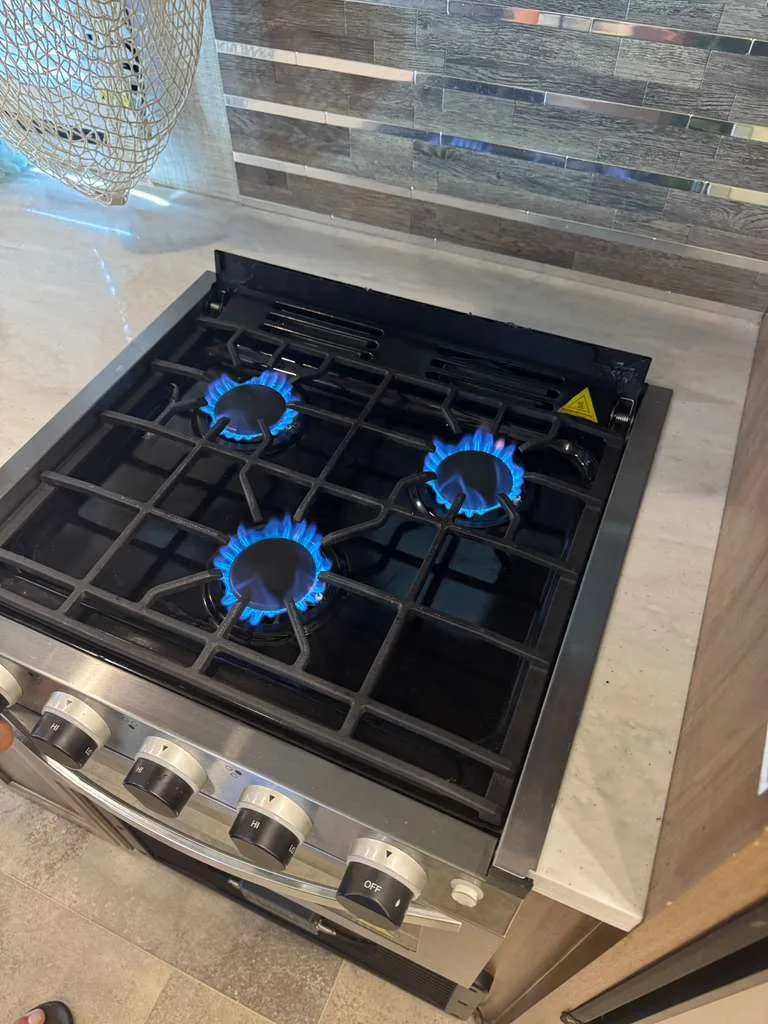
The first thing we check is not the cold, it is whether heat is actually reaching the boiler. A digital multimeter across the 120V AC heating element should read roughly 44 ohms on a 325-watt element, and on propane we want a steady blue flame with the regulator holding 11 inches of water column.
Second, we take real temperatures with an infrared thermometer and a probe, because the eyebrow display is a setting, not a thermometer. A healthy box holds 35F to 40F on the fresh side and 0F to 10F in the freezer.
Third comes the reading that decides everything. If the boiler tube is too hot to touch while the condenser fins at the top of the stack are still at ambient after 30 minutes, heat is going in and no cold is coming out. That is a dead sealed system, and only after that test do we bother checking the thermistor and the power board.
How an Absorption Cooling Unit Actually Makes Cold

A Norcold absorption cooling unit has no compressor, no refrigerant pump and no moving parts. It is a welded steel loop charged with ammonia, water, hydrogen gas and sodium chromate, and the only thing driving it is heat.
At the boiler, a propane burner or the AC element boils an ammonia and water solution. The ammonia vapor separates off, condenses in the finned condenser at the top of the stack, then runs down into the evaporator where it meets hydrogen gas.
Hydrogen lowers ammonia's partial pressure so it evaporates at low temperature, and evaporating is what pulls heat out of your food. In the absorber, water takes the ammonia back into solution, the hydrogen returns to the evaporator, and gravity feeds the weak solution back down to the boiler to start again.
Because gravity and thermosiphon do all the pumping, level and heat load are not comfort details on this appliance. They are the pump.
Why Sustained 90F Heat Kills These Units First
Weeks of 90F-plus ambient are exactly the condition an absorption fridge cannot argue with. The cooling unit sheds heat by convection off the condenser fins into the air behind your sidewall vent, so the hotter that air is, the less heat it can reject.
When it cannot reject heat fast enough, the solution in the boiler overheats and circulation slows or stalls. Sodium chromate, the corrosion inhibitor riding in the water, precipitates out of solution and hardens inside the percolator tube.
That deposit is permanent and it is cumulative. Once it narrows the tube, the unit runs hotter still, which precipitates more chromate, until the boiler either blocks solid or the tube fatigue-cracks and vents ammonia.
It is why a coach parked in full afternoon Florida sun, with a dark sidewall and a stock vent, can lose a cooling unit years earlier than the same rig living up north.
Norcold Model Families, Parts, and How They Differ From Dometic
Norcold's RV absorption line splits into the older N-series (N611, N621, N641) and the 1200 series (1200LRIM, 1210, 1211). Both use a boiler and burner assembly, a thermistor on the fresh-food fins, and a power board that arbitrates 120V AC against LP.
The thermistor is the part most often blamed and least often broken. Norcold's common thermistor, part 618548, should measure roughly 7,000 to 10,000 ohms at 77F, and a reading well outside that feeds the board bad data and leaves a warm box with a healthy cooling unit.
On the 1200 series the power board is commonly Norcold 621270001. The eyebrow codes are worth reading first: no AC means 120V is missing, no FL means the burner never proved flame, and no CO means the fridge never reached temperature in time.
Dometic's equivalents, the RM2652 and the DM and NDR families, use different board logic and cooling unit geometry, so nothing crosses over.
Repair, Replace, or Convert to Residential: The Honest Version
A sealed absorption system cannot be repaired in your driveway. Welding a leaking boiler tube and recharging it means evacuating the loop, charging anhydrous ammonia under pressure and re-passivating the steel. That is factory work, not a service call.
So the honest menu has three items. If the cooling unit is intact and the fault is the thermistor, the AC element, the burner assembly or the board, that is a real repair and far cheaper than the alternatives.
If the cooling unit itself is dead, the choice is a replacement cooling unit dropped into your existing Norcold cabinet, new or remanufactured, against a residential 12V compressor fridge. The cooling unit alone is a substantial part cost before any labor, and the installed job lands well above a component repair, which is why it is worth proving the cooling unit is genuinely dead first.
A conversion often costs about the same, cools harder in Florida heat and ignores level. It also needs battery and inverter capacity you may not have, which is the part most conversion pitches leave out.
What the Replacement Job Actually Involves On Site
The refrigerator has to come out of the coach. We pull the exterior lower vent, shut off and disconnect the LP line, disconnect the 120V and 12V feeds, back out the mounting screws and walk the cabinet out through the door or the slide opening.
On a lot of Florida coaches the fridge sits behind a slide-out, so the slide has to be run out before anything moves, which means shore power or a generator has to stay live. That one detail often decides whether we can do the job in your site or need you on a level pad with 50-amp service.
The old cooling unit unbolts from the back of the cabinet. The new one goes on with fresh thermal mastic, the boiler insulation and flue are rebuilt, then the fridge is reinstalled, leak-checked at the LP fitting and run for several hours before we call it finished.
Plan on most of a day. A cooling unit swap is not a two-hour call.
Sources
Every figure on this page comes from a manufacturer document or a standards body, not from another repair site. Here is where each one comes from.
- Thetford / Norcold - Product Compliance and Recall InformationThe FAQ statement that Norcold issued recalls covering certain refrigerator models for boiler tube failures that could lead to fire, and where owners are directed for recall claims.
- NHTSA recall notice 10V563 - Norcold 1200, 1201, 1210 and 1211 gas absorption refrigeratorsThat the recall covers the 1200 series models named on this page and that the remedy is a high temperature sensing device fitted to interrupt power to the refrigerator before an overheating boiler can cause a fire.
- Thetford (Norcold) N4150 gas absorption refrigerator - support and FAQNorcold's own support page for a current gas absorption model, now published by Thetford, which owns the brand. It confirms the AC/LP absorption architecture described in the section on how a cooling unit makes cold, gives the manufacturer's leveling limits for a gas absorption box - no more than 3 degrees side to side or 6 degrees front to back - and states that a Norcold needs a minimum of 115V on both sides of the fuse to perform on AC.
- Thetford (Norcold) Polar Elite N20DC - 12V DC compressor RV refrigeratorThat a 12V DC compressor refrigerator is a real manufacturer alternative to an absorption box: Norcold lists the Polar Elite N20DC as a 19 cu. ft. 12V DC compressor RV refrigerator that fits an 18 cu. ft. cutout and runs up to 20 hours on a single battery charge, which is exactly the conversion option weighed against a replacement cooling unit and the battery capacity caveat attached to it.
Related repairs
- Dometic Fridge Board Repair
- our Residential Fridge Conversion service
- Rv Icemaker Water Line in Florida
Other systems we service
Where we work
Service category
What this usually costs
| Item | Price | What it covers |
|---|---|---|
| Service call | $299 | Includes the trip out to your RV and the first hour on site |
| Work past the first hour | Quoted after diagnosis | We tell you what it will take before we carry on |
| Parts | Quoted per job | Special-order parts may need a deposit before we order them |
| Written estimate | No charge | You approve the estimate before any work starts |
The service call covers the trip out to your RV and the first hour on site. Anything beyond that depends on what we find, and we quote it and get your approval before carrying on.
The price ranges on this page come from our own recent jobs across Florida, not from an industry average. What you pay depends on the rig, the parts it needs and what we find on site, so we give you a written estimate before any work begins and you approve it first.
Frequently asked questions
Can a leaking Norcold cooling unit be repaired instead of replaced?
No, not in the field. The cooling unit is a welded, sealed steel loop holding ammonia, water and hydrogen under pressure, and once it vents there is no charge left and the steel has usually corroded internally. Rebuilding one requires evacuating, recharging with anhydrous ammonia and re-passivating the tubing, which is factory or remanufacturing work. On site, the only honest fix is a replacement cooling unit.
What does the no CO code on my Norcold eyebrow mean?
No CO means the control decided the refrigerator did not reach its target temperature within the time it was allowed. It points at cooling performance, not at a specific broken part, so it can come from a dead cooling unit, a weak burner, a failed AC element, or a thermistor reporting nonsense. It is a reason to test heat input and condenser temperature, not a reason to buy a cooling unit on the spot.
How long does a Norcold cooling unit replacement take?
Plan on most of a working day. Pulling the fridge, transferring the cooling unit, rebuilding the boiler insulation and flue, reinstalling, leak-checking the LP fitting and then running the box long enough to prove it is actually pulling temperature all takes real time. If the fridge sits behind a slide-out, add the setup time to run the slide and keep power live while we work.
Is a leaking Norcold cooling unit dangerous?
Treat it seriously. A leak vents ammonia, which is irritating and unmistakable by smell, and the yellow-green powder you may see behind the fridge is sodium chromate residue. Norcold also issued recalls covering certain 1200 series and some N-series units for boiler tube cracks that could lead to fire, with a high-temperature limit switch as the remedy. If you smell ammonia, shut the fridge off at both LP and 120V and ventilate.
Should I just convert to a residential refrigerator instead?
Sometimes, and it is worth pricing both. A 12V compressor fridge cools harder in sustained Florida heat, does not care whether the rig is level and has no ammonia to leak. The catch is power: it runs continuously off the battery bank, so it usually needs lithium capacity, a capable inverter or DC-DC charging, and a cabinet opening that fits. Without that, a replacement cooling unit is the better call.
My fridge cools overnight but climbs to 50F by mid-afternoon. Is the cooling unit failing?
That pattern is usually a heat rejection problem before it is a dead cooling unit. Overnight the ambient drops and the unit keeps up; by afternoon the air in the sidewall chase is too hot to absorb more heat. Check the vent for wasp nests and debris, confirm the baffle is intact, and consider a fan kit. If the boiler is hot and the condenser stays at ambient even at night, the sealed system is the problem.